Customer Payments
Accounting > Accounts Receivable > Customer Payments
The Customer Payments screen is used to create and manage customer payments and credit memos.
Note: This screen is only available for districts with the Accounts Receivable module.

-
Search - search by identifier
-
All Statuses - filter by document status (All Statuses (default), Draft, Posted)
-
All Customers - filter by customer, building, staff, or student
-
Reset - click to reset search parameters
-
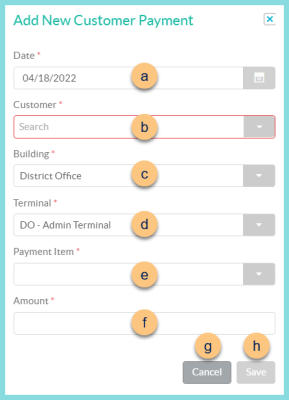
Add New Customer Payment - click to add a new payment
-
Date - select payment date
-
Customer - select the customer, building, staff, or student making the payment
-
Building - select building where payment was made
-
Terminal - select the terminal where the payment was made
-
Payment Item - select the payment item from the list of items marked as Available for Customer Payment Transaction
-
Amount - enter the amount paid
-
Cancel - click to return to the previous screen without saving changes
-
Save - click to be redirected to the individual payment screen
-
Advanced - click to open advanced filters
-
All Buildings - filter by building
-
Select date range - filter by date range
-
Search - click to apply advanced filters
-
Identifier - click to sort by identifier
-
Date - click to sort by date
-
Building - click to sort by building
-
Person - click to sort by customer name
-
Status - click to sort by payment status
-
Total - click to sort by total
-
Pencil - click to be redirected to the individual payment screen
-
< > - click to scroll through pages
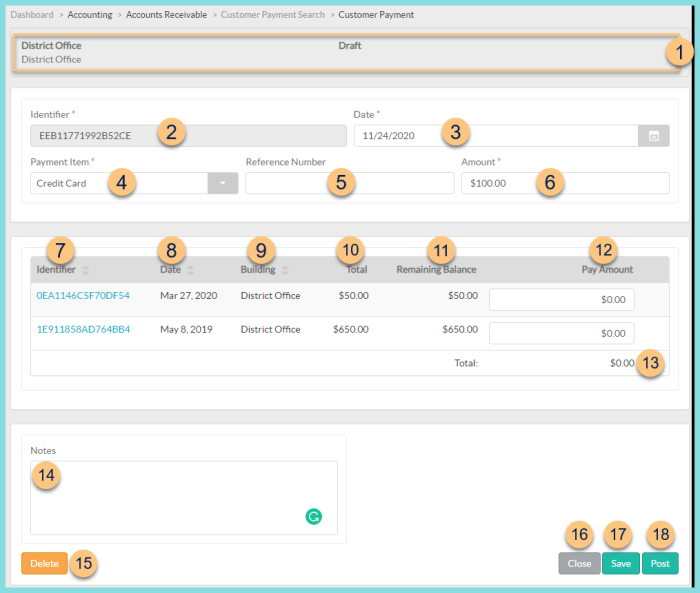
Individual Payment Screen
-
Notice the Customer Name, Building, Status, and Remaining Balance (posted payments only).
-
Identifier - notice the randomly generated payment identifier
-
Date - change the payment date if needed
-
Payment Item - change the payment item if needed. Note: Only payment items marked as Available for Customer Payment Transaction are available.
-
Reference Number - enter a reference number if applicable
-
Amount - update the payment amount if needed
-
Identifier - click to sort by customer document identifier. Click the identifier to be redirected to the individual customer document.
-
Date - click to sort by document date
-
Building - click to sort by document building
-
Total - notice the document total
-
Remaining Balance - notice the remaining balance of the document
-
Pay Amount - enter the amount of the payment to be applied to the document with a remaining balance
-
Total - notice the sum of the Pay Amount column. Note: The Total must match the payment Amount (6) to post.
-
Notes - enter notes if needed
-
Delete - click to delete payment record
-
Close - click to return to the previous screen without saving changes
-
Save - click to save changes
-
Post - click to post the payment