Sales Orders
Accounting > Accounts Receivable > Sales Orders
The Sales Orders screen is used to create and manage Sales Orders within the Accounts Receivable module.
-
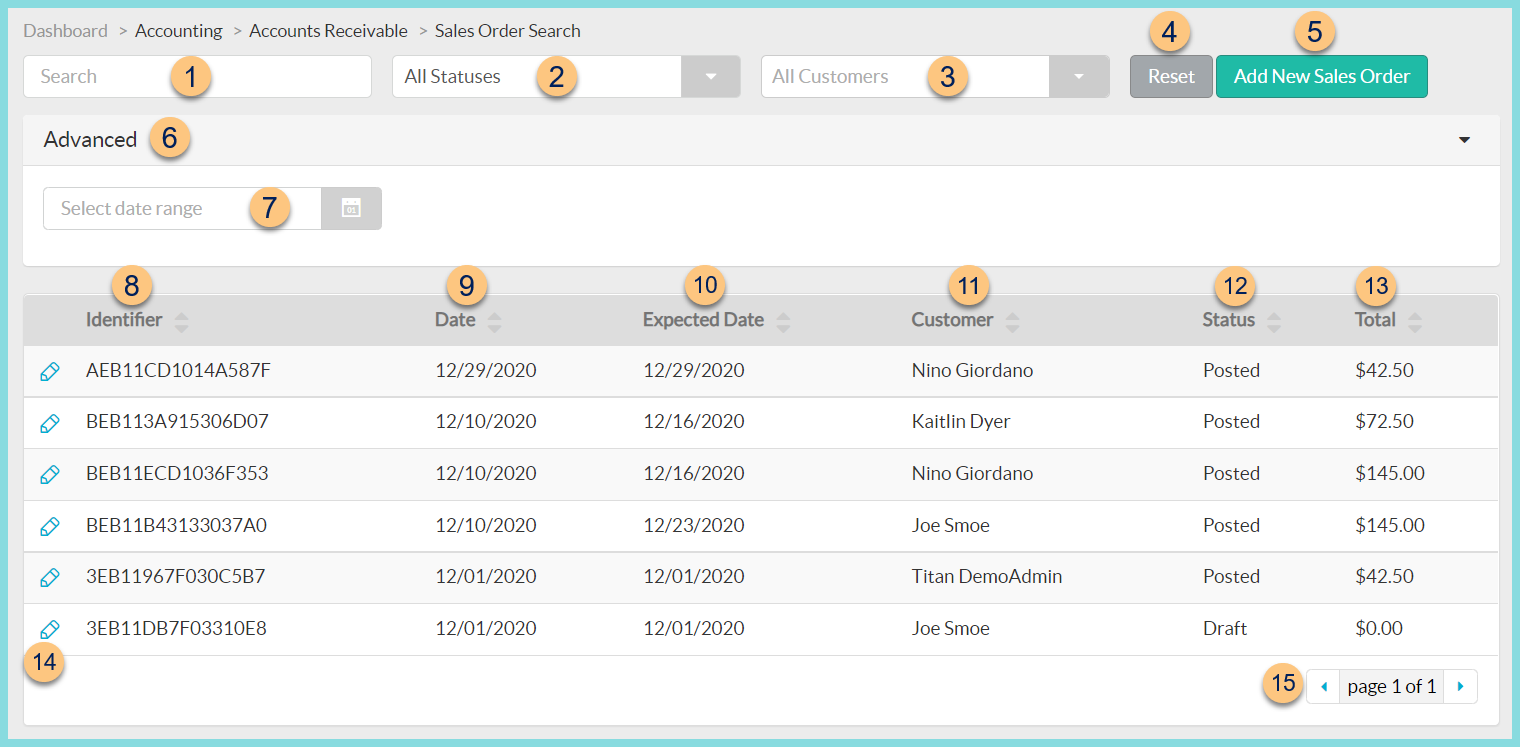
Search - search by identifier
-
All Statuses - filter by status (All Statuses (default), Draft, Paid, Posted, Voided)
-
All Customers - filter by customer
-
Reset- click to reset search parameters
-
Add New Sales Order - click to add a new sales order
-
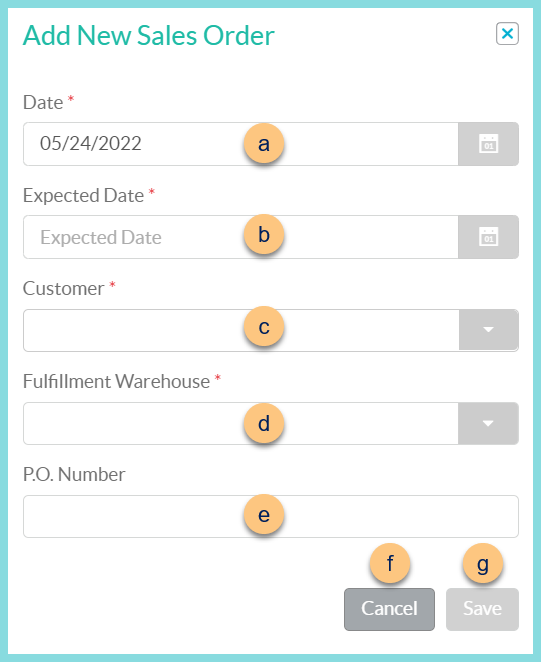
Date - select date of order (default: today)
-
Expected Date - select date of delivery
-
Fulfillment Warehouse - select warehouse that will fulfill the order
-
P.O. Number - enter a purchase order number
-
Cancel - click to return to the previous screen without creating the order
-
Save - click to be redirected to the individual sales order screen
-
Advanced - click to open advanced filters
-
Select Date Range - filter by date range
-
Identifier - click to sort by identifier
-
Date - click to sort by date
-
Expected Date - click to sort by expected date
-
Customer - click to sort by customer
-
Status - click to sort by status
-
Total - click to sort by total
-
Pencil - click to be redirected to the individual sales order screen
-
< > - click to scroll through pages
Individual Sales Order Screen

-
Notice the Identifier, Customer Name, Status, and Total. Click Print Document to request a copy of the order.
-
Nutrient Composition Report (not pictured, posted only) - click to request the recipe nutrient report
-
Date - change the document date if needed
-
Expected Date - change the expected date if needed
-
P.O. Number - update the purchase order number if needed
-
Fulfillment Warehouse - change the fulfillment warehouse if needed
-
Billing Address - update the billing address if needed. Note: This field is auto-populated with the customer billing address.
-
Mailing Address - update the mailing address if needed. Note: This field is auto-populated with the customer mailing address.
-
Identifier - notice item identifier
-
Name - notice the item name and modify if needed
-
Quantity - notice the quantity and adjust if needed
-
Unit of Measure - notice the unit of measure and adjust if needed
-
Price - notice the price and adjust if needed
-
Total - notice the total = Quantity x Price
-
Taxable - check to indicate that sales tax is to be applied to this item
-
Double Arrows - click and drag to rearrange item order
-
Trash Can - click to remove the item from the document
-
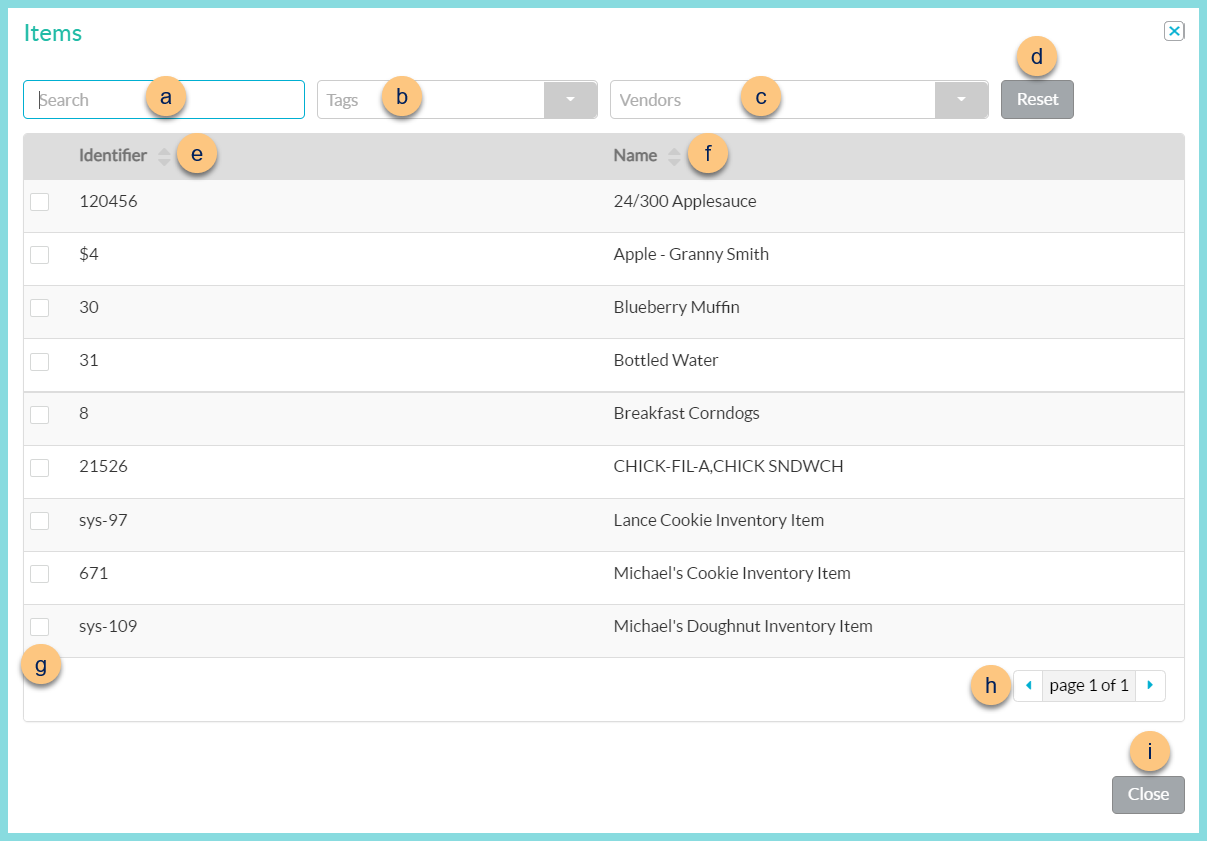
Search Items - search for items or click the Magnifying Glass to add invoice items to the document
-
Search - search for invoice items
-
Tags - filter by item tags
-
Vendors - filter by vendors
-
Reset - click to reset filters
-
Identifier - click to sort by identifier
-
Name - click to sort by name
-
Checkbox - check to add item to document
-
< > - click to scroll through pages
-
Close - click to return to the document screen with selected items
-
Note (optional) - enter a note to appear on the document
-
Notes - notice any internal notes and click (+) Add New Note to add additional notes. Notes are not editable.
-
Delete - click to delete the document
-
Close - click to return to the previous screen without saving changes
-
Save - click to save changes
-
Post - click to post the document