Relationships
Configuration > Demographics > Relationships
Additional relationships are typically configured based on the Student Information file if needed as the SIS import is configured.
-
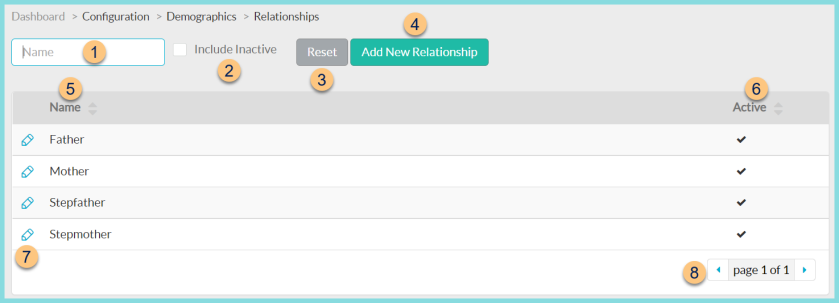
Name - search by name
-
Include Inactive - check to include inactivated relationships
-
Reset - click to reset search parameters
-
Add New Relationship - click to add a new relationship
-
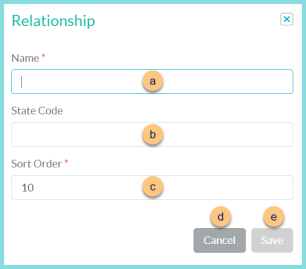
Name - enter relationship name
-
State Code (optional) - enter state code for documentation purposes only
-
Sort Order - change sort order if needed
-
Cancel - click to return to the previous screen without saving changes
-
Save - click to save changes
-
-
Name - click to sort by name
-
Active - click to sort by active status
-
Pencil - click to edit an existing relationship
-
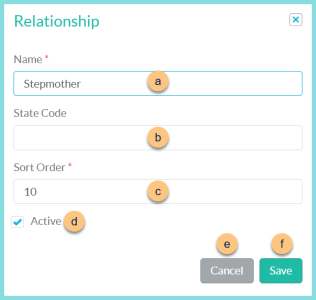
Name - enter relationship name
-
State Code (optional) - enter state code for documentation purposes only
-
Sort Order - change sort order if needed
-
Active - toggle active status
-
Cancel - click to return to the previous screen without saving changes
-
Save - click to save changes
-
-
< > - click to scroll through pages
Default Relationships:
-
Father
-
Mother
-
Stepfather
-
Stepmother