Administrative Sale Layout
Configuration > Point of Service > Administrative Sale Layout
This page is used to manage templates for Bulk Sales.
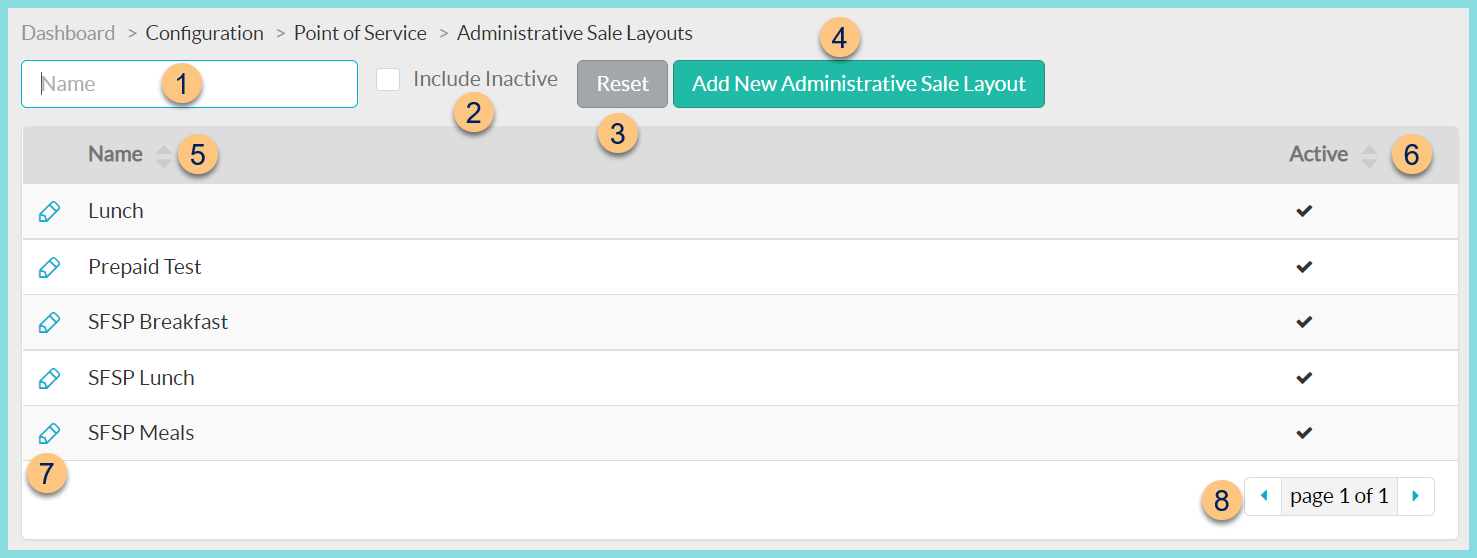
Administrative Sale Layout Screen
-
Name - search by name
-
Include Inactive - check to include inactivated layouts
-
Reset - click to reset search parameters
-
Add New Administrative Sale Layout - click to add a new layout
-
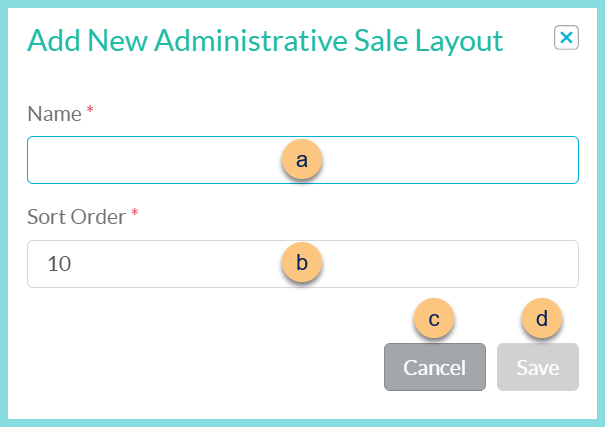
Name - enter layout name
-
Sort Order - change sort order if needed
-
Cancel - click to return to the previous screen without saving changes
-
Save - click to create the layout and be redirected to the individual layout screen
-
-
Name - click to sort by name
-
Active - click to sort by active status
-
Pencil - click to be redirected to the individual layout screen
-
< > - click to scroll through pages
Individual Administrative Sale Layout Screen
-
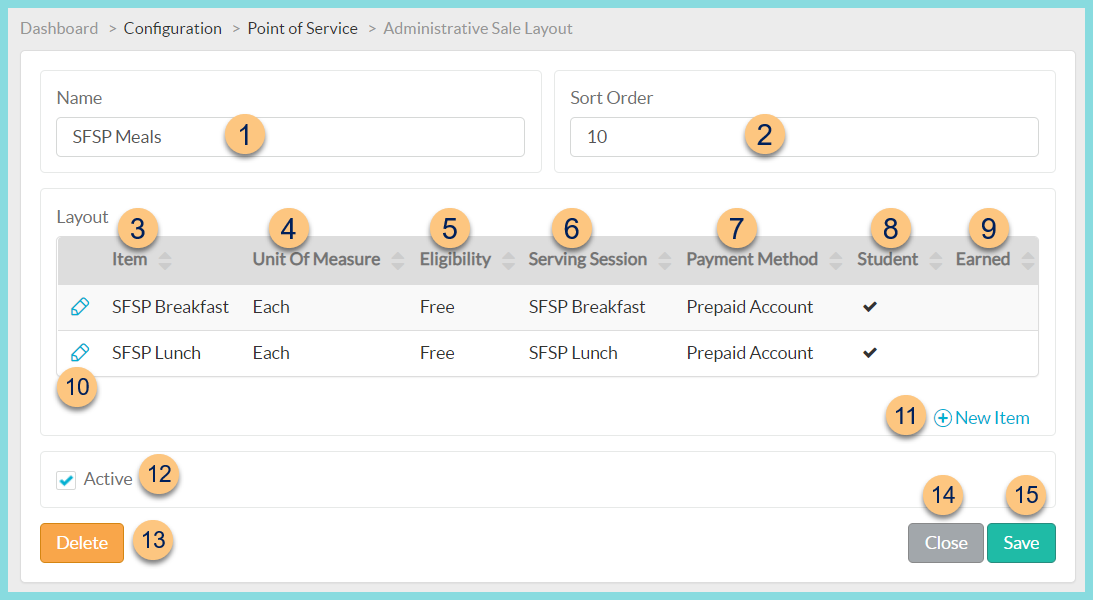
Name - change layout name if needed
-
Sort Order - change sort order if needed
-
Item - click to sort by sales item name
-
Unit Of Measure - click to sort by sales unit of measure
-
Eligibility - click to sort by eligibility status
-
Serving Session - click to sort by serving session
-
Payment Method - click to sort by Payment Method
-
Student - click to sort by student (checked) or non-student (unchecked) status
-
Earned - click to sort by earned status
-
Pencil - click to edit line item details
-
Notice the Serving Session, Item, Unit Of Measure, and Payment Method.
-
Price - enter a unique price for the item to appear on the Administrative Sale Layout if the item's price is different when entered as a bulk transaction
-
Allow Price Override - check to allow price to be customized upon entering each bulk transaction
-
Earned - check to designate the line item as earned
-
Sort Order - change the sort order if needed
-
Delete - click to remove the line item
-
Cancel - click to return to the previous screen without saving changes
-
Save - click to save changes
-
-
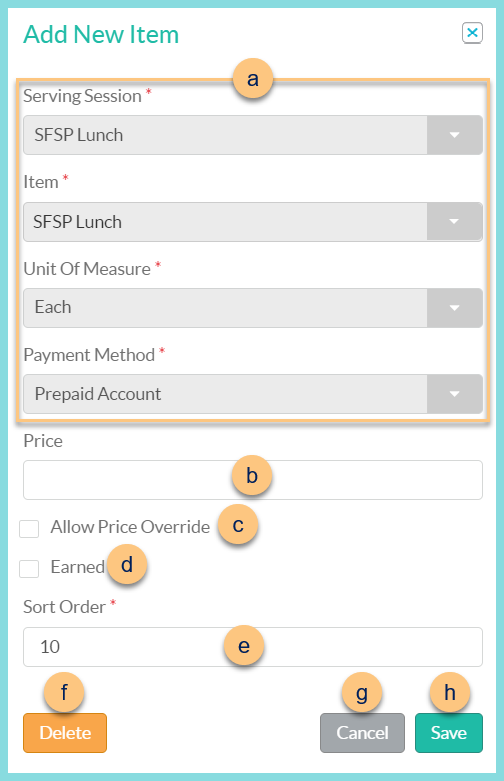
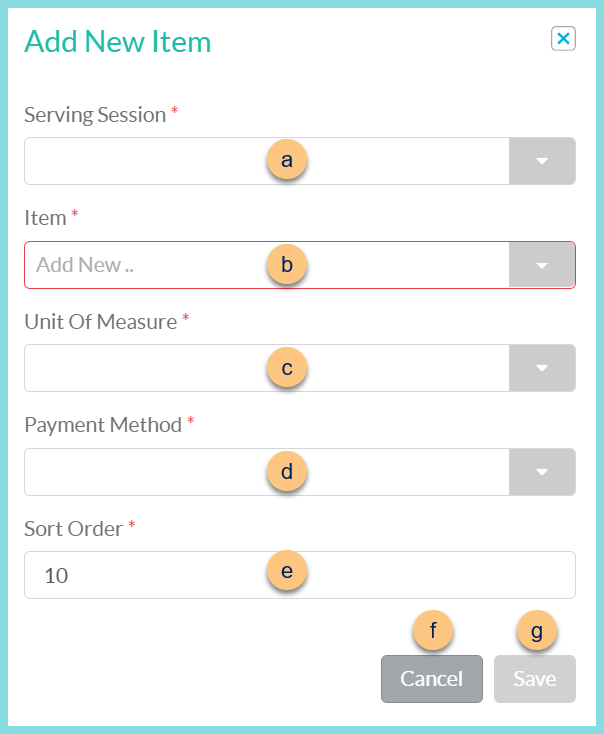
(+) New Item - click to add a new item to the layout
-
Serving Session - select serving session
-
Item - select sales item
-
Unit Of Measure - select sales unit of measure
-
Payment Method - select payment method (Note: Prepaid Account is recommended for no cost items.)
-
Sort Order - change sort order if needed
-
Cancel - click to return to the previous screen without saving changes
-
Save - click to save changes
-
-
Active - toggle active status
-
Delete - click to delete layout
-
Close - click to return to the Administrative Sale Layout Screen without saving changes
-
Save - click to save changes