Financial Systems Accrual Accounts Tab
After accounts have been imported, create an Accrual Accounts mapping for student and non-student accruals for each building.
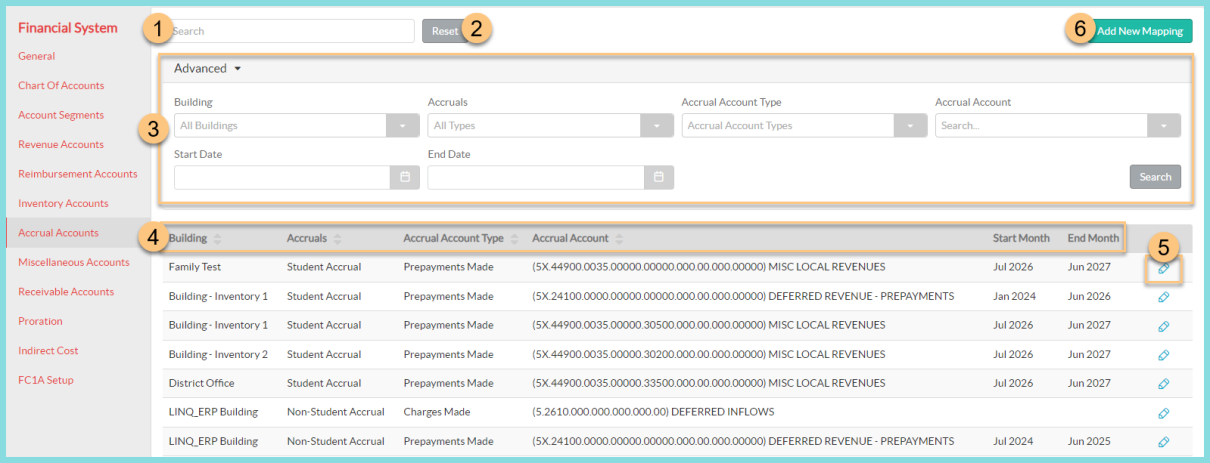
- Search for a previously configured Accrual Account mapping.
-
Click Reset to restore search and filter options back to their defaults.
-
Click Advanced to open the advanced filtering menu, if needed.
-
Filter configured Accrual Accounts by Building, Accruals, Accrual Account Type, Accrual Account code, Start and/ or End Date by using the corresponding drop-down menu.
-
Click Search to apply filters to the Accrual Accounts table.
-
-
Notice the Accrual Account table headers including Building, Accruals, Accrual Account Type, Accrual Account, Start Month and End Month. Click a header to sort data rows by that column.
-
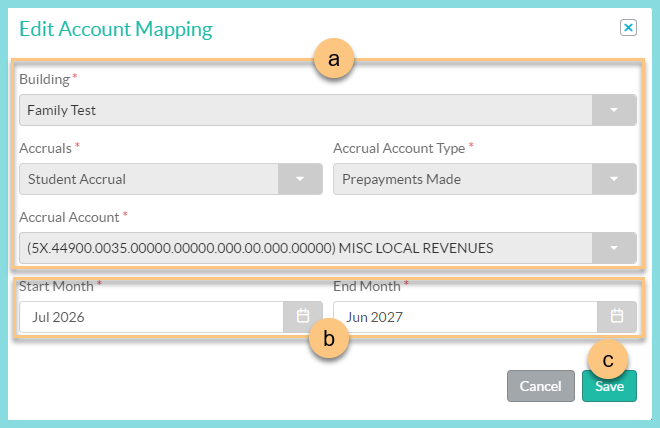
Click the Pencil to open the Edit Account Mapping modal.
-
Once a mapping has been created, the configuration details can be viewed, but cannot be changed.
-
Adjust the Start Month or End Month as necessary.
Note: Adjust the End Month to a previous month to expire the mapping. -
Click Save to apply any changes.
-
-
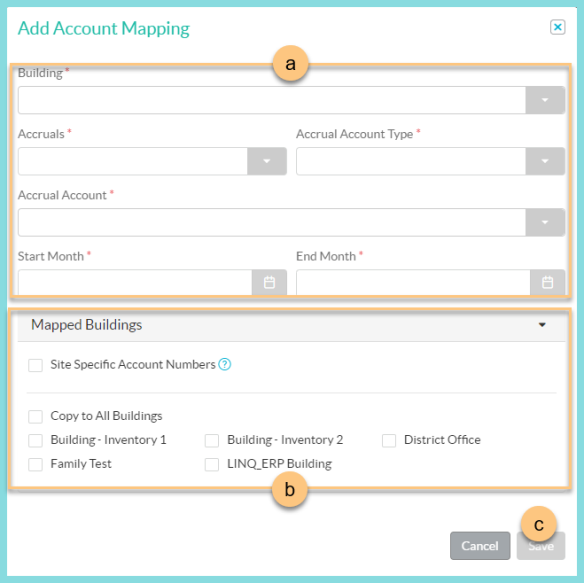
Click Add New Mapping to open the Add Account Mapping modal.
-
Select the Building, Accruals, Accrual Account Type, Accrual Account, Start Month and End Month.
-
Click Mapped Buildings to expand the building configuration section.
-
Check Site Specific Account Numbers if you have a designated Accrual Account code for each building.
-
Check Copy to All Buildings if this account mapping can be used at all of your serving sites OR,
-
Check the buildings this account mapping applies to.
-
-
Click Save.
Repeat Step 6 as needed.
-