Fee Management
Fees > Fee Management
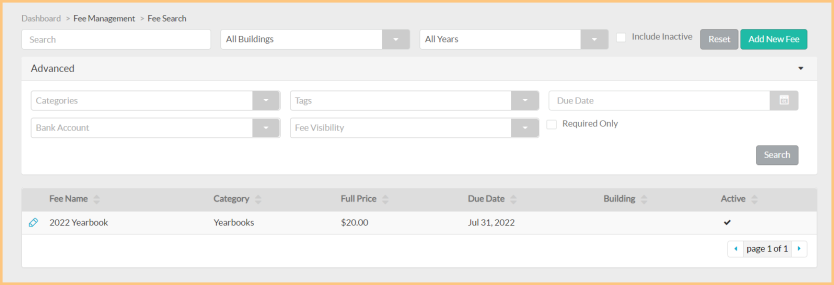
The Fee Management menu is similar to the Item Management menu. From here, users can create, view, print, duplicate, and delete fees that will appear in LINQ Connect. Fees can be assigned to students or staff members.
Navigating the Screen
-
Search: Search for a fee by name.
-
Buildings: Filter by building.
-
Years: Filter by year.
-
Include Inactive: Click to include inactive fees in search results.
-
Reset: Click to reset all search parameters.
-
Advanced: Filter by fee Categories, Tags, Due Date, Bank Account, Fee Visibility, and if the fee is Required.
-
Pencil: Click to edit a fee.
-
Scroll: Click to scroll through pages of the grid.
Adding a New Fee
-
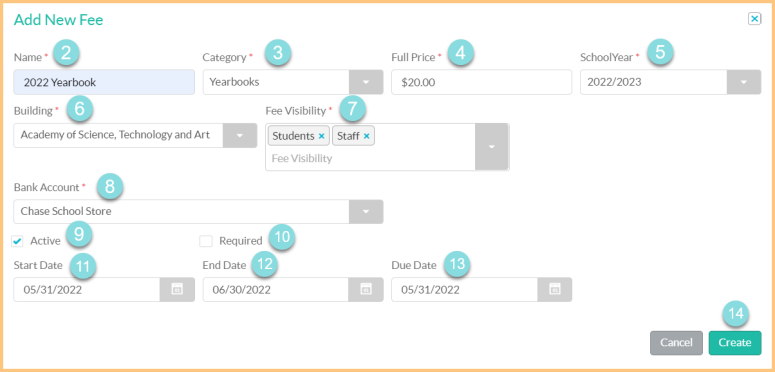
Add New Fee: Click this button to add a new fee.
-
Name: Enter a name for the fee.
-
Category: Select the fee category.
-
Full Price: Enter the full price of the fee.
-
School Year: Select a school year.
-
Building: Select the building.
-
Fee Visibility: Indicate who can see this fee in LINQ Connect. Multiple options can be selected.
-
Student: Any student linked to a parent's LINQ Connect account.
-
Staff: Only staff members
-
Assigned: Only students assigned to this fee.
-
-
Bank Account: Select the bank account.
-
Active: Check if this fee is active.
-
Required: Check if this is a required fee.
-
(Optional) Start Date: Enter the date the fee is available for purchase.
-
(Optional) End Date: Enter the date the fee is no longer available for purchase.
-
(Optional) Due Date: Enter the due date.
-
Create: Click this button to create the fee. The fee's detailed screen appears with the General tab displayed.
-
The Identifier and Name display at the top of the screen.
-
Click the Camera icon to upload a picture for the fee.
-