Check
Reports > Accounting > Check
The check report is used to print checks based on unpaid vendor documents.
-
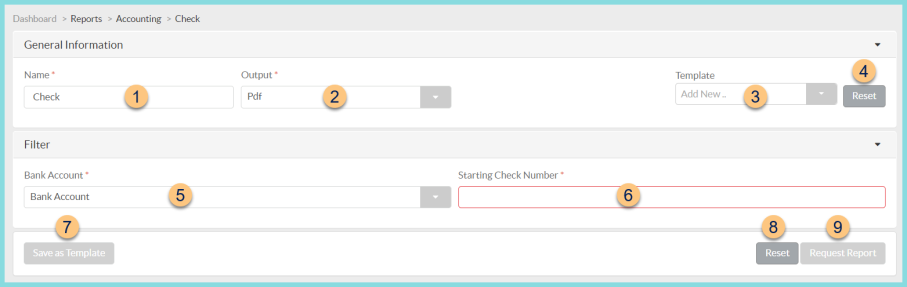
Name - enter a report name
Default: Check -
Output - select output format (Html, Pdf (default))
-
Template - select a report template
-
Reset - click to reset to default options
-
Bank Account - select the bank account from which to cut checks
-
Starting Check Number - enter the starting check number for the batch of checks
-
Save as Template - click to save the selected filters and columns as a template
-
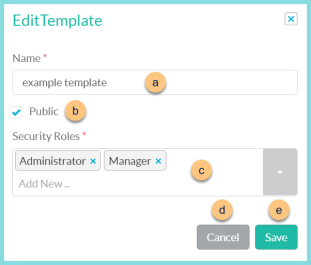
Name - enter a template name
-
Public - check to make the template available to other users
-
Security Roles - select the security roles that can access a Public template
-
Cancel - click to return to the previous screen without saving the template
-
Save - click to save the template
-
Reset - click to reset to defaults
-
Request Report - click to request report
Note: Report will appear in the bell icon when complete
Check Report Format
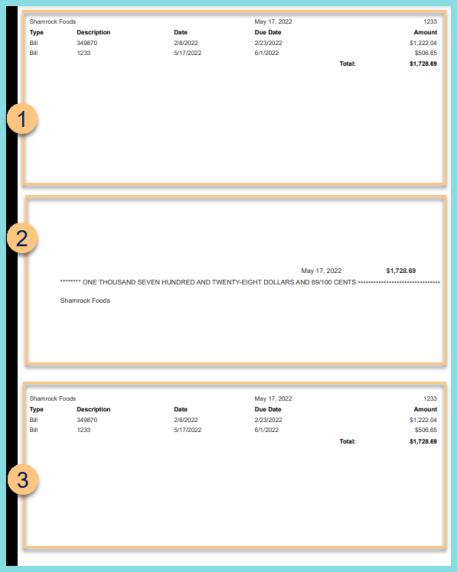
Checks are meant to be printed on formal check paper. Up to 12 vendor documents will be listed and included in the total amount. If more than 12 items are included, a check ledger page will run automatically to be included in payment envelope.
-
Check Stub - notice the list of included vendor documents (document count greater than 12 will be included on a subsequent page)
-
Check
-
Duplicate Check Stub - notice the duplicate copy of the check stub; one is kept for internal use, one is sent to the payee