Receiving Ticket
Reports > Inventory > Receiving Ticket
Items > Item Receipt
The Receiving Ticket report is used to get a print out of item receipts. If multiple receipts are requested at once, there will be a page break between each receipt.
-
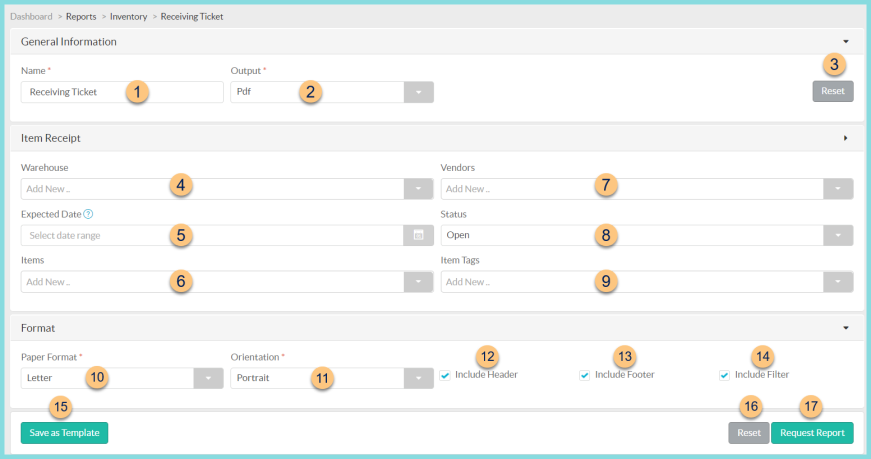
Name - enter a report name
Default: Receiving Ticket -
Output - select output format (Html, Pdf (default))
Template (not pictured) - select a report template -
Reset - click to reset to default options
-
Warehouse - filter by receiving warehouses
-
Expected Date - filter by date range; if no date is selected the current date is used
-
Items - filter by item(s)
-
Vendors - filter by vendor(s)
-
Status - filter by receipt status (Blank, Open (default), Completed)
-
Item Tags - filter by item tag
-
Paper Format - choose a paper format (CR80, Legal, Letter (default))
-
Orientation - choose orientation (Landscape, Portrait (default))
-
Include Header - check to include report header
-
Include Footer - check to include report footer
-
Include Filter - check to include selected filters
-
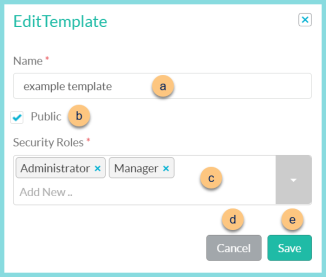
Save as Template - click to save the selected filters and columns as a template
-
Name - enter a template name
-
Public - check to make the template available to other users
-
Security Roles - select the security roles that can access a Public template
-
Cancel - click to return to the previous screen without saving the template
-
Save - click to save the template
-
Reset - click to reset to defaults
-
Request Report - click to request report
Note: Report will appear in the bell icon when complete
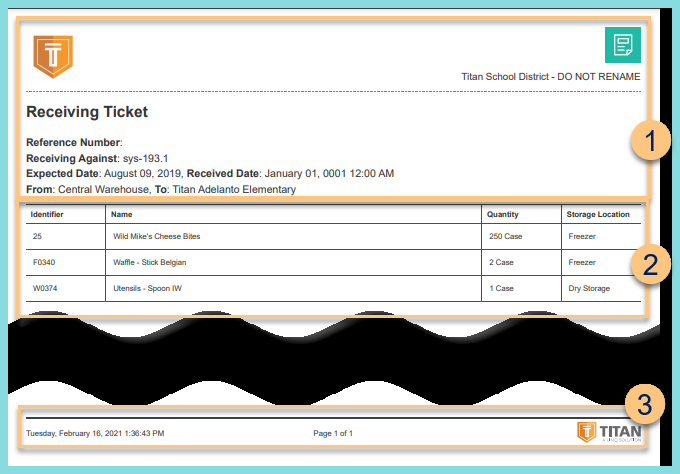
Report Format - Warehouse Transfer Receipt
-
Header - notice the District Logo, District Name, Report Title, Reference Number, Receiving Against, Expected Date, Received Date, Fulfilling Warehouse, and Receiving Warehouse.
-
Details - notice the identifier, name, quantity, and storage location of each item
-
Footer - notice the date and time the report was requested, pages, and TITAN logo
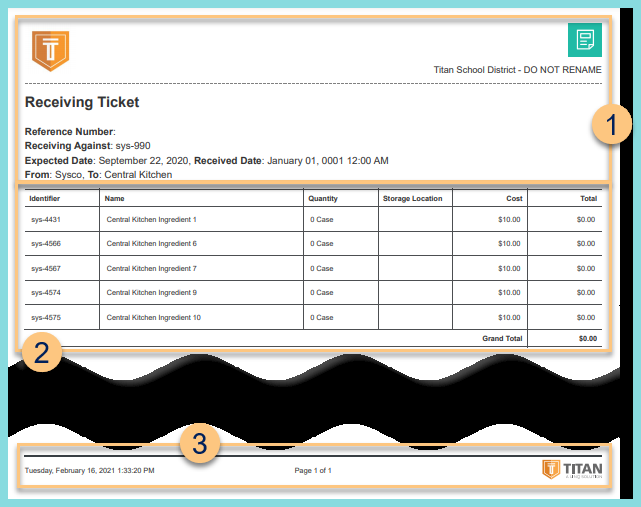
Report Format - Vendor Order Receipt
-
Header - notice the District Logo, District Name, Report Title, Reference Number, Receiving Against, Expected Date, Received Date, Vendor, and Receiving Warehouse.
-
Details - notice the identifier, name, quantity, storage location, cost, and total of each item; notice the grand total
-
Footer - notice the date and time the report was requested, pages, and TITAN logo