Eligibility Letters
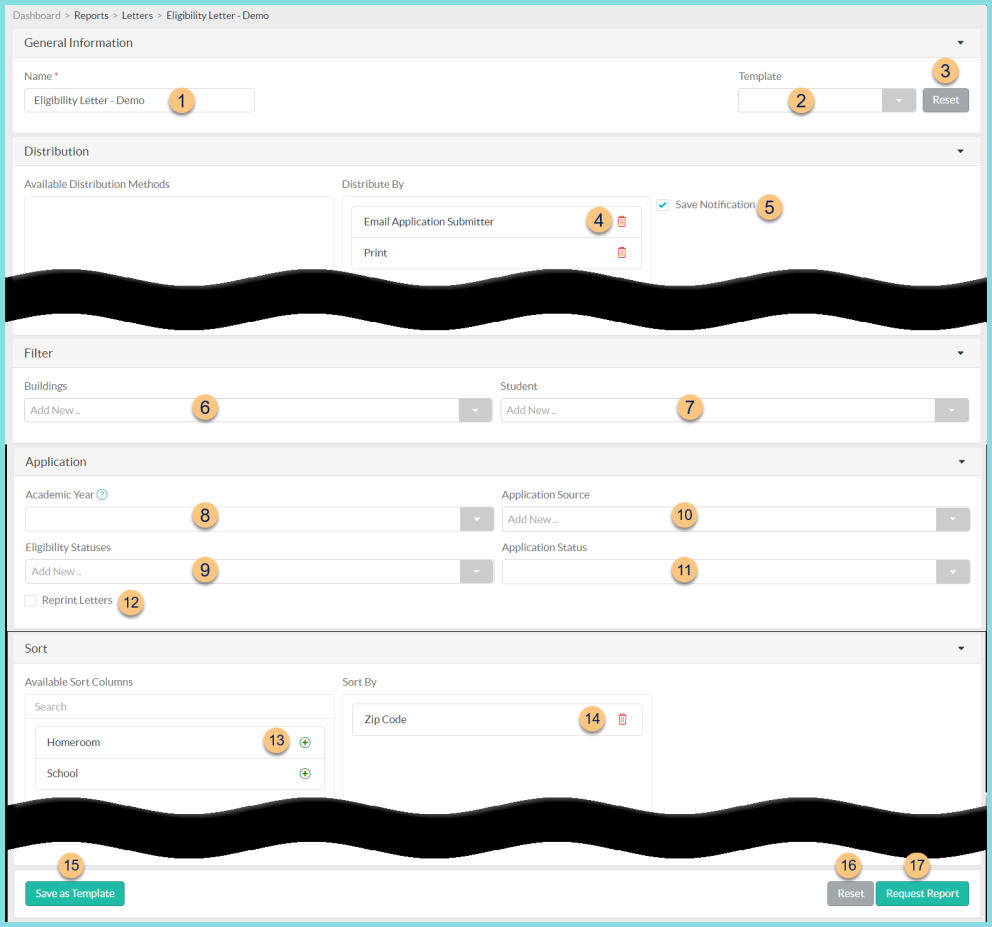
Reports > Letters > Eligibility Letter - District Name
Students > Meal Applications
The eligibility letter is used to formally notify families of meal application results.
Note: The eligibility letter must be configured before it can be run.
-
Name - enter a report name. Default: Template Name
-
Template - select a report template
-
Reset - click to reset to default options
-
Distribute By - drag and drop to change the distribute by priority. Click the Trash Can to remove the distribution method. (Default: Email Application Submitter, Print)
Note: notifications are distributed in the order of the distribute by selections. TITAN will attempt the first selection, if that is not possible, the next method will be attempted, and so on. -
Save Notification - check to save a record of the notification
-
Buildings - filter by school(s)
-
Student - filter for specific students
-
Academic School - filter by Application Academic Year; note: if blank, the current year is used
-
Eligibility Statuses - filter by application Eligibility Status
-
Application Source - filter by application source
-
Application Status - filter by application status (blank (default), duplicate, processed)
-
Reprint Letters - check to print letters that have been run previously
Application Processed Date Range (not pictured, reprint only) - select the date range of applications to reprint
Exclude Emailed Letters (not pictured, reprint only) - check to indicate that only PDF letters will be regenerated -
(+) - click or drag and drop to move available sort columns to the Sort By field
Note: Homeroom, School, and Zip Code are available for sorting. -
Drag and Drop to arrange Sort By columns in order of sort priority or click the Trash Can to remove a field
-
Save as Template - click to save the selected filters and columns as a template

-
Name - enter a template name
-
Public - check to make the template available to other users
-
Security Roles - select the security roles that can access a Public template
-
Cancel - click to return to the previous screen without saving the template
-
Save - click to save the template
-
Reset - click to reset to defaults
-
Request Report - click to request report
Note: Report will appear in the bell icon when complete