Production Worksheet
Reports > Menu Planning > Production Worksheet
Menu Planning > Production Records > (Production Record) > (Date) > Print Production Worksheet
The Production Record Report returns a working copy of the planned production record for documenting production. The blank spaces are for production staff to write production numbers.
-
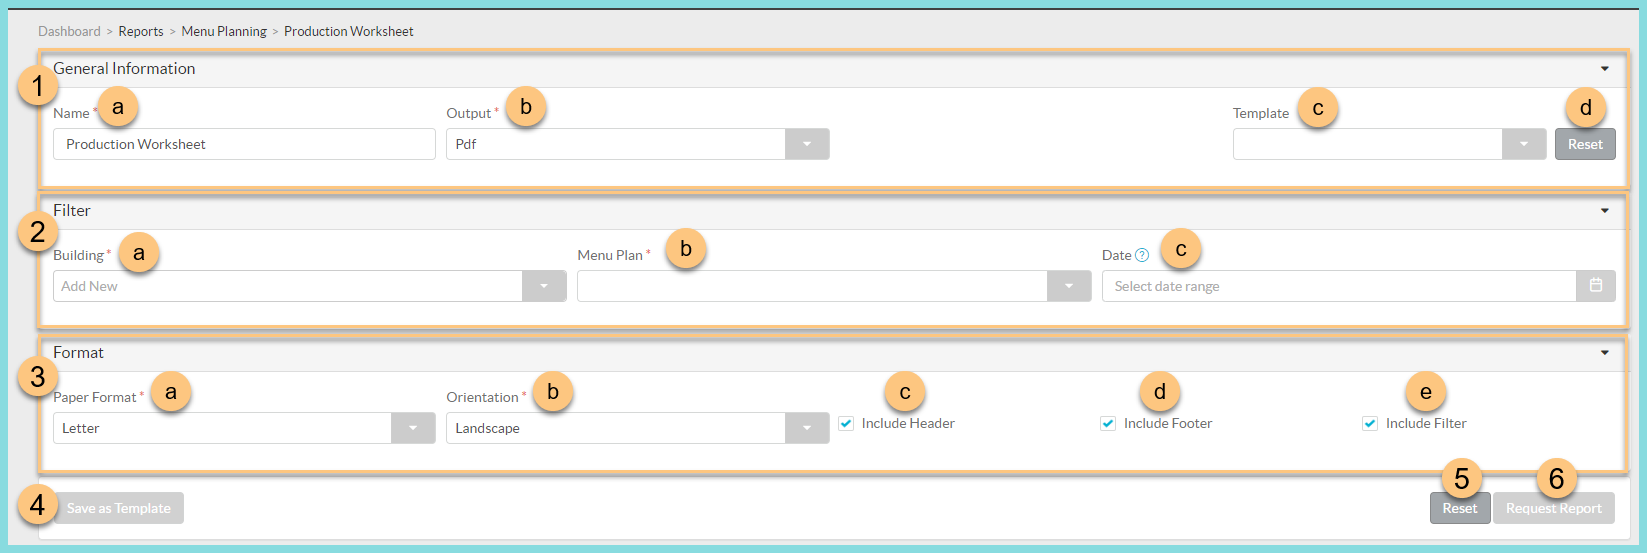
General Information: Select the report structure parameters.
-
Enter a Name for the report.
Default: Production Worksheet -
Select the Output of the report (HTML or PDF).
Default: PDF -
Select a report Template if you would like to use the parameters of a previously configured report. Then skip to Step 6. (Optional)
-
Click Reset to restore default selections.
-
-
Filter: Filter the report data.
-
Select a Building to filter by production site.
-
Select a Menu Plan to filter by linked menu plan.
-
Select a Date range to filter by production date range.
-
-
Format: Configure output formatting.
-
Select the Paper Format (CR80, Legal, or Letter).
Default: Letter -
Select the Orientation (Landscape or Portrait)
Default: Portrait -
Check Include Header to include the District Logo and the report name.
-
Check Include Footer to include the time and date stamp of the report request, page numbers, and the TITAN logo.
-
Check Include Filter to include the information selected in Step 2.
-
-
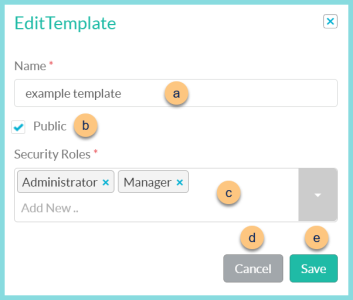
Click Save as Template to save the selected parameters as a template for future use.
-
Enter a template Name.
-
Check Public to make the template available for other users.
-
Select the Security Roles that can access the public template.
-
Click Cancel to return to the previous screen without saving this report as a template or
-
Click Save.
-
Click Reset to restore defaults.
-
Click Request Report to run the report. The report will appear in the bell icon when complete.
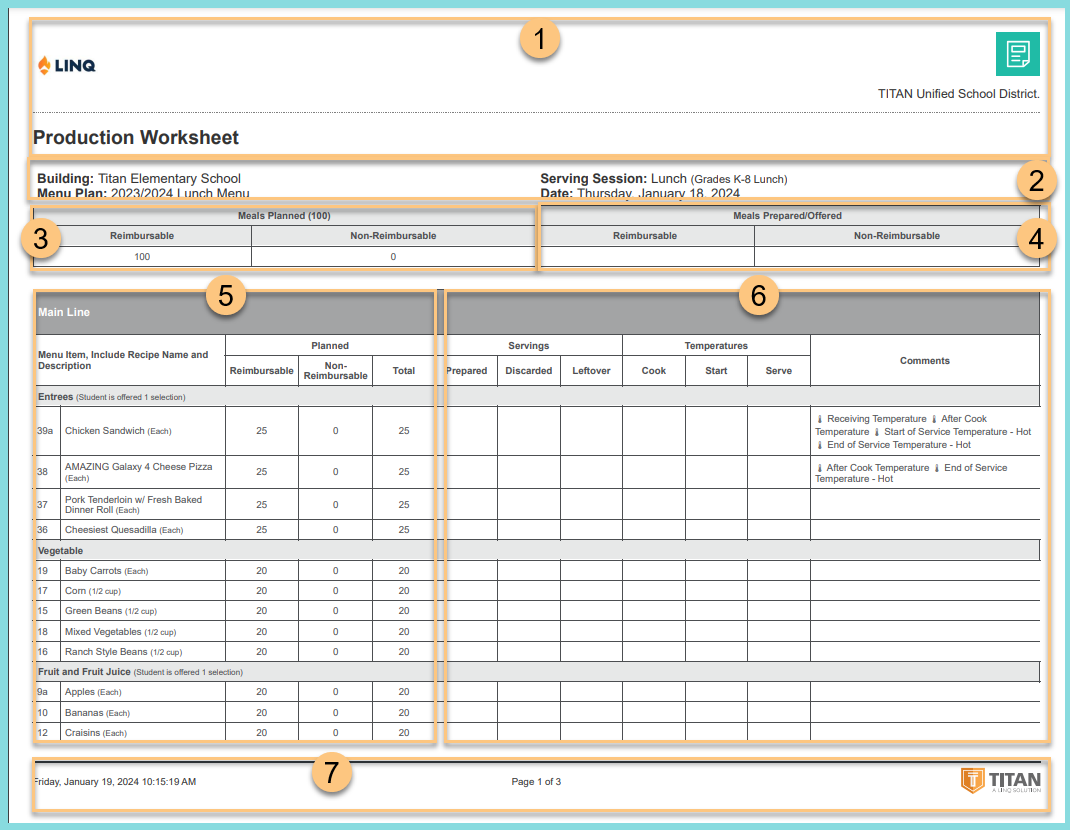
Report Format
-
Header: Notice the District Logo and the name of the report.
-
Filters: Notice the Building Name, Menu Plan, Serving Session, and Date.
-
Meals Planned: Notice the total, reimbursable, and non-reimbursable planned meal quantities.
-
Meals Prepared/Offered: Notice the space to write the number of Reimbursable Offered meals for later documentation.
-
Planned Items: Notice the Meal Name, Recipe Category, Offered Selections, Recipe Identifier, Recipe Name, Serving Size, and the Planned Reimbursable, Non-Reimbursable, and Total Quantities.
-
Prepared Items: Notice the space to record production information regarding servings Prepared, Discarded, and Leftover, Cook, Start, and Serve temperatures, and any related comments.
Note: If a control measure has been documented on a recipe step, it will be notated in the Comments column. -
Footer: Notice the date and time the report was requested, pages, and TITAN logo.
Notes (not pictured, displayed only if a note has been entered): Notice any documented notes.