Transaction Receipt
Reports > Transaction > Transaction Receipt
Point of Service > Sales > Printer Icon
Students > Student Management > (Student) > Transactions > Printer Icon
Staff > Staff Management > (Staff) > Transactions > Printer Icon
The Transaction Receipt report is used to report on the details of single transactions.
-
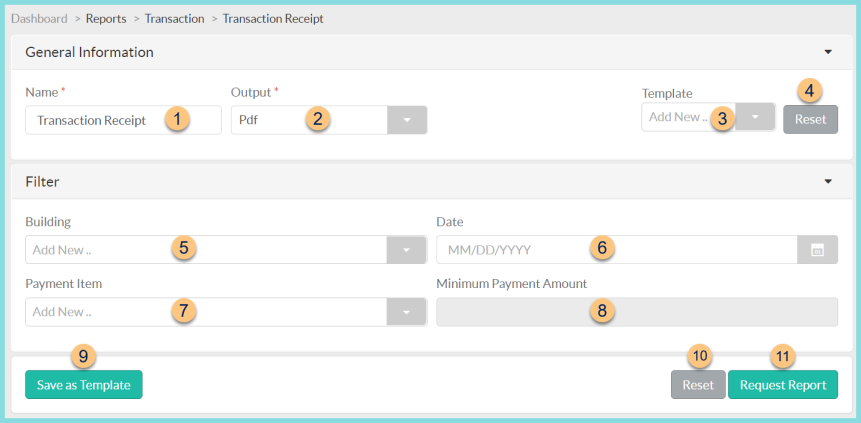
Name - enter a report name
Default: Transaction Receipt -
Output - select output format (Csv, Excel, Html, Json, Pdf (default))
-
Template - select a report template
-
Reset - click to reset to default options
-
Building - filter by building
-
Date - filter by transaction date
-
Payment Item - filter by payment item
-
Minimum Payment Amount - enter minimum payment amount. Note: Payment Item must be selected first.
-
Save as Template - click to save the selected filters and columns as a template
-
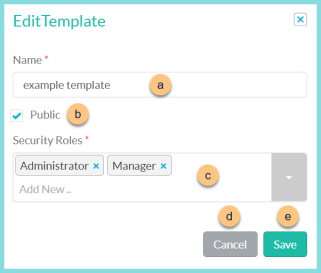
Name - enter a template name
-
Public - check to make the template available to other users
-
Security Roles - select the security roles that can access a Public template
-
Cancel - click to return to the previous screen without saving the template
-
Save - click to save the template
-
Reset - click to reset to defaults
-
Request Report - click to request report
Note: Report will appear in the bell icon when complete
Report Format
-
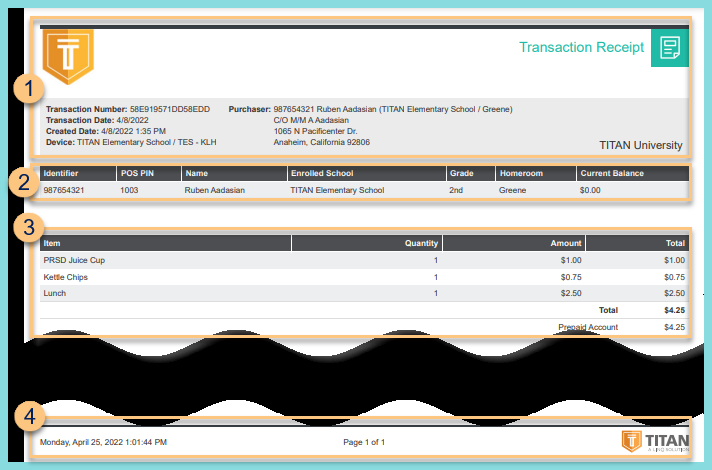
Header - notice the District Logo, Report Title, Transaction Number, Transaction Date, Created Date, and Device. Notice the Purchase information including Person ID, Person Name, School, Homeroom, and Mailing Address.
-
Notice the person information including: Identifier, POS PIN, Name, Enrolled School, Grade, Homeroom, and Current Balance.
-
Notice the transaction information including: Item, Quantity, Amount, Total per item, Transaction Total, and Payment Item and Total.
-
Footer - notice the date and time the report was requested, pages, and TITAN logo