Announcements
Utilities > Announcements
The Announcements screen is used to create announcements that will be visible to users.
-
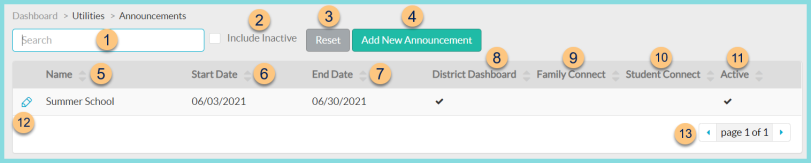
Search - search by announcement name
-
Include Inactive - check to include inactivated announcements
-
Reset - click to reset search parameters
-
Add New Announcement - click to create a new announcement. See Step 12 for details.
-
Name - click to sort by name
-
Start Date - click to sort by start date
-
End Date - click to sort by end date
-
District Dashboard - click to sort by district dashboard status
-
Family Connect - click to sort by Family Connect status
-
Student Connect - click to sort by Student Connect status
-
Active - click to sort by active status
-
Pencil - click to edit announcement settings
-
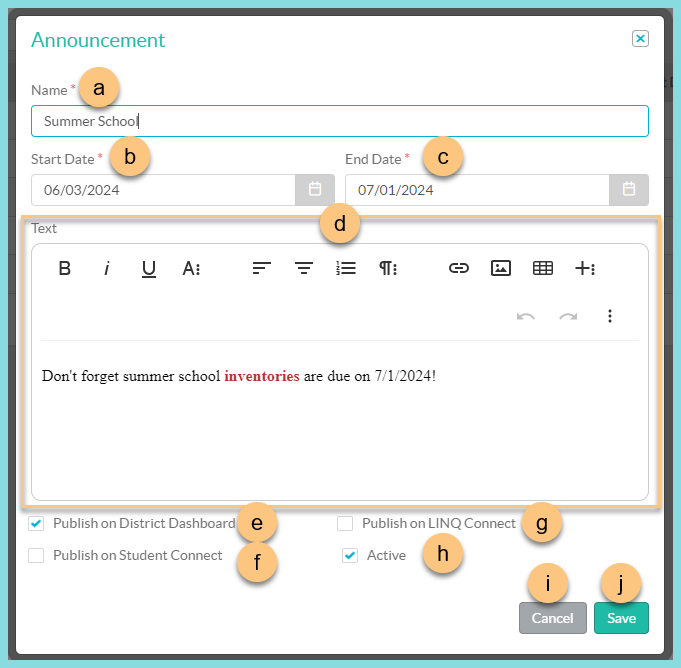
Name - enter announcement name
-
Start Date - select the announcement display start date
-
End Date - select the announcement display end date
-
Text - enter the announcement text and use the WYSIWYG editor to format as needed
-
Publish on District Dashboard - check to display the announcement in the Announcements dashboard widget
-
Publish on Student Connect - check to display the announcement in the Student Connect app
-
Publish on LINQ Connect - check to display the announcement on LINQ Connect.
-
Active - toggle active status
-
Cancel - click to return to the previous screen without saving changes
-
Save - click to save changes
-
< > - click to scroll through pages