Batches
Accounting > Accounts Payable > Batches
A batch consolidates all vendor documents in Awaiting Payment or Unapplied status. Batches represent batches of checks to be printed.
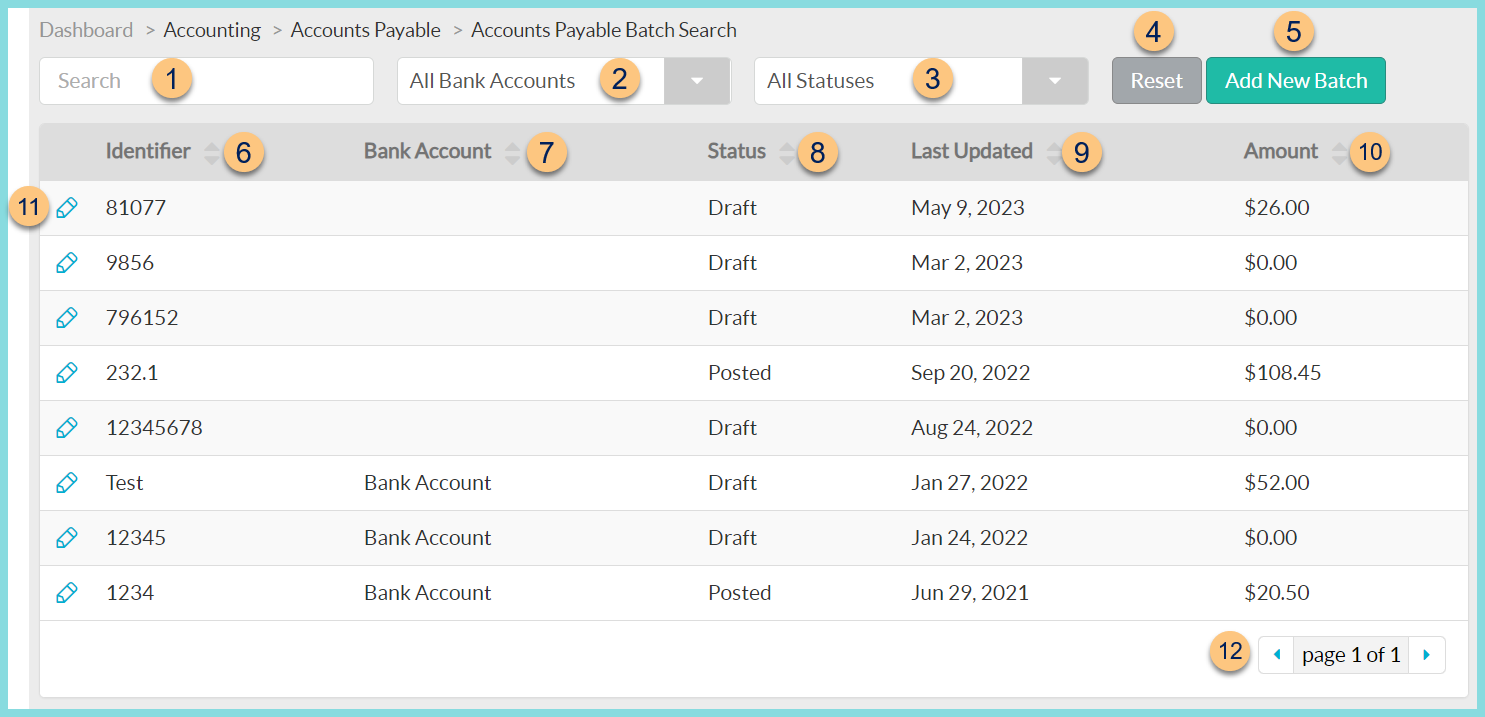
Batches Screen
-
Search - search by identifier
-
All Bank Accounts - filter by bank accounts
-
All Statuses - filter by batch status
Draft, Posted -
Reset - click to reset search parameters
-
Add New Batch - click to add a new batch
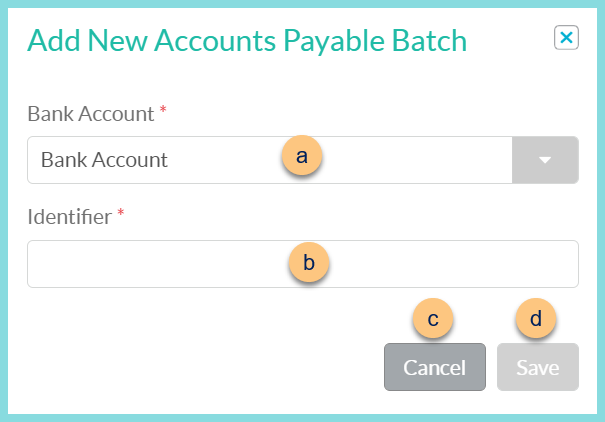
- Bank Account - select bank account
- Identifier - enter batch identifier
- Cancel - click to return to the Batches screen without creating a batch
- Save - click to create the batch and be redirected to the individual batch screen (below)
- Identifier - click to sort by batch identifier
- Bank Account - click to sort by bank account
- Status - click to sort by batch status
- Last Updated - click to sort by the last updated date
- Amount - click to sort by the total dollar amount
- Pencil - click to be redirected to the individual batch screen (below)
- < > - click to scroll through pages
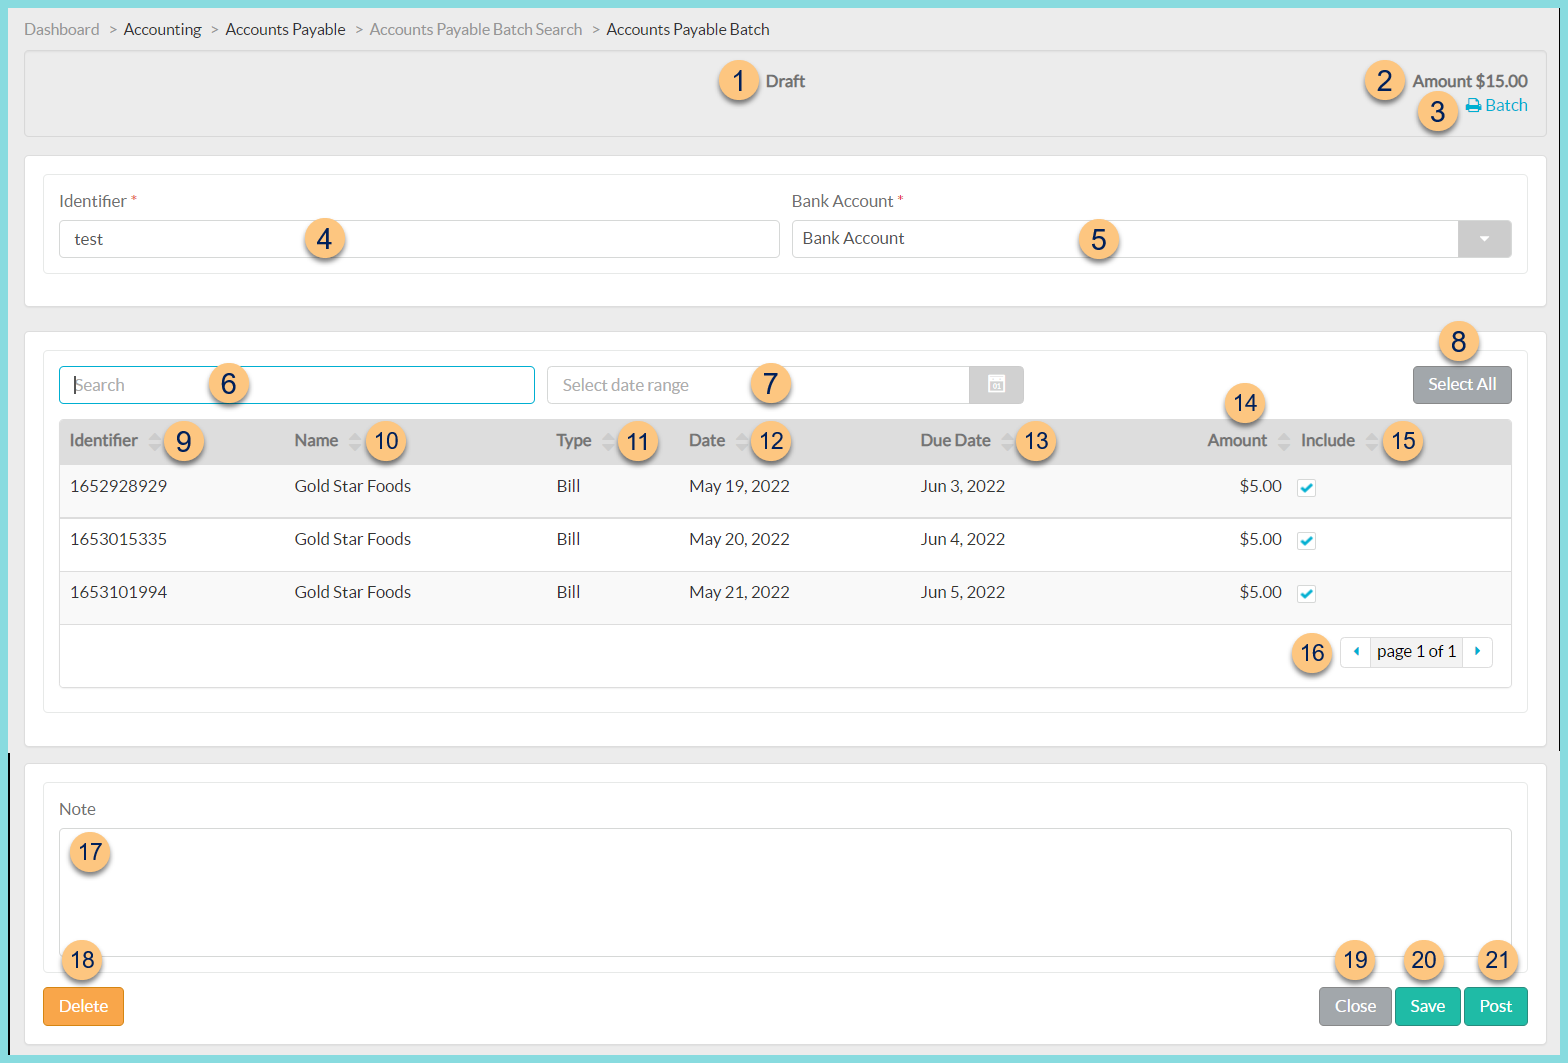
Individual Batch Screen
-
Status
-
Amount $X.XX
-
Print Batch - click to print Batch Report
-
Identifier - edit identifier if needed
-
Bank Account - change bank account if needed
Override Due Date (not pictured, financial integrations only) - check and select a date to override the due date of each selected item to be included in the batch to the selected date -
Search - search by identifier, name, or type
-
Select date range - search by date range
All Vendor Documents in Awaiting Payment or Unapplied status appear below. -
Select All - check to select all vendor documents across multiple pages
-
Identifier - click to sort by Document Identifier
-
Name - click to sort by Vendor Name
-
Type - click to sort by Document Type
-
Date - click to sort by Document Date
-
Due Date - click to sort by Document Due Date
-
Amount - click to sort by Total Dollar Amount of Document
-
Include - click to sort by inclusion status; check to include vendor document in batch of checks
Note: TITAN will block the selection of receipts linked to different orders for data transmission purposes in districts with an active Financial System Integration. Receipts that are not tied to an order may also be selected. -
< > - click to scroll through pages
-
Note - types notes as needed
-
Delete - click to delete batch
-
Close - click to close batch without saving changes
-
Save - click to save batch
-
Post - click to post batch. Large batches are run as a job, and a notification will appear in the Bell upon completion. Upon posting, each included check will appear in bank documents.
Submit to Ledger (not pictured, financial integrations only) - click to post the batch and submit to the ledger of the integrated ERP system. The batch will be sent as one 'invoice' with line item details.
Manually ERP Processed (not pictured, financial integrations only) - click to post the batch in TITAN without submitting to the ledger of the integrated ERP system.