Online Applications Screen
Students > Online Applications
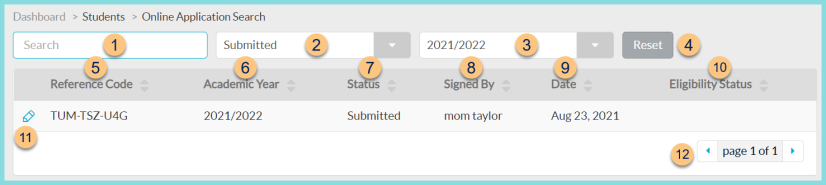
Online Applications is where meal applications submitted via LINQ Connect are processed.
Online Applications Screen
-
Search - search by reference code, parent name, or student name
-
Status - filter by application status (All Statuses, Duplicate, In Progress (Draft), In Progress (Incomplete), Invalid, Processed, Reviewed, Second Review, Submitted, Verification, Custom Online Meal Application Status(es))
-
YYYY/YYYY - filter by Academic Year. Note: The current year is the default.
-
Reset - click to reset search parameters
-
Reference Code - click to sort by online application reference code
-
Academic Year - click to sort by Academic Year
-
Status - click to sort by online application status (Duplicate, In Progress (Draft), In Progress (Incomplete), Invalid, Processed, Reviewed, Second Review, Submitted, Verification, Custom Online Meal Application Status(es))
-
Signed By - click to sort by name of signer
-
Date - click to sort by date submitted
-
Eligibility Status - click to sort by eligibility status (processed applications only)
-
Pencil - click to be redirected to the individual online application screen
-
< > - click to scroll through pages
Individual Online Application
-
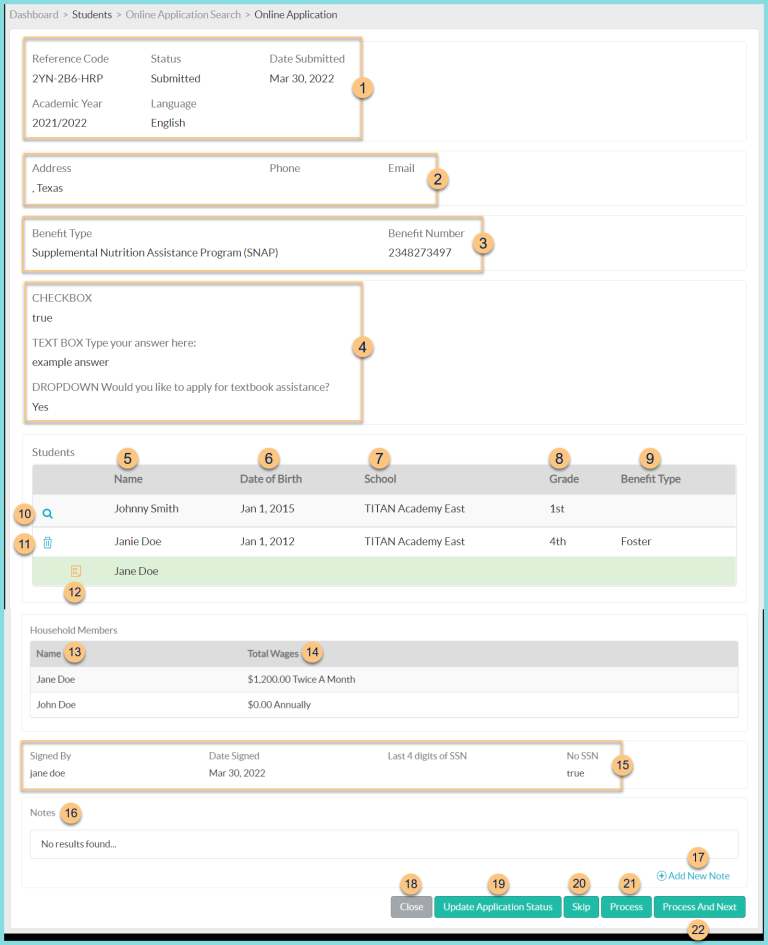
Notice the Reference Code, Status, Date Submitted, Academic Year, Language, and Number of All Household Members Including Students.
-
Notice the Address, Phone, and Email.
-
Notice the Benefit Type and Benefit Number if indicated.
-
Notice the Meal Application Questions and Answers if any.
-
Name - notice the student name as entered (white line) or as found in TITAN (green line)
The white bar shows the data entered on the online application. If a match for the student is found in TITAN, an additional green bar will show the student's information from the student database. -
Date of Birth - notice the date of birth as entered (white line) or as found in TITAN (green line)
-
School - notice the school as selected (white line) or as found in TITAN (green line)
-
Grade - notice the grade as selected (white line) or as found in TITAN (green line)
-
Benefit Type - notice the other source categorically eligible benefit type(s) selected if any
-
Magnifying Glass (unmatched students only) - click to search for a match manually in the district's student database
-
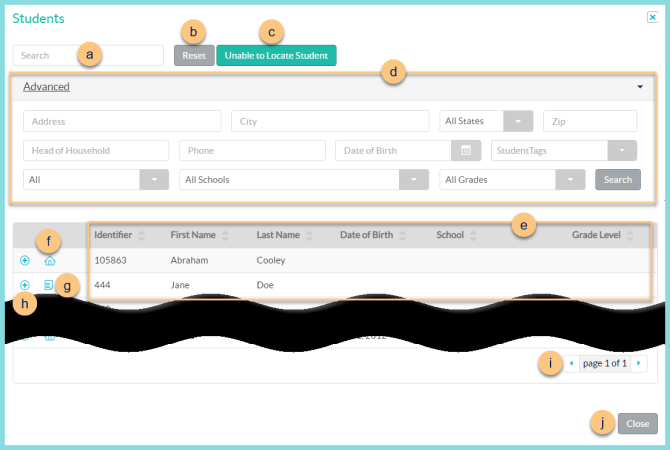
Notice the Name, Date of Birth, School, Grade, and Benefit Type as entered on the online application.
-
Search - search for existing students by name or identifier
-
Reset - click to reset search parameters
-
Click Advanced to open additional filters including Address, Head of Household, Phone, Date of Birth, Student Tags, All (enrollment status), Schools, and Grades. Click Search to apply advanced filters.
-
Notice the Identifier, First Name, Last Name, School, Grade Level, Date of Birth, and Active status of students in the database. Click the header to sort by that field.
-
House Icon, Truck Icon (not pictured) - hover to see the home address or mailing address respectively
-
Paper Icon - hover to see current meal application information. An orange icon indicates that the application is expiring soon. Note: This icon is only visible if the student has another application on file
-
Pencil - click to select the student as a match
-
< > - click to scroll through pages
-
Trash Can (matched students only) - click to remove an existing match, then return to Step 10
-
Paper Icon - hover to see current application information if any
Student Income (not pictured) - notice the student income entered if any -
Name - notice the name of each household member as entered
-
Total Wages - notice the total income entered for each household member as entered
Notice the Ethnicity and Race if entered (not pictured). -
Notice Signed By, Date Signed, and Last 4 Digits of SSN or No SSN.
-
Notes - notice any existing notes
-
(+) New Note - click to add a new note
-
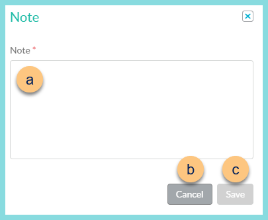
Note - enter note text. Note: Notes are not editable once saved.
-
Cancel - click to return to the previous screen without saving changes
-
Save - click to save changes
-
Close - click to return to the previous screen without saving changes
-
Update Application Status - click to choose a custom online meal application status if needed

-
Status - choose a custom online meal application status
-
Cancel - click to return to the previous screen without saving changes
-
Save - click to save changes
-
Skip - click to move to the next online application without processing this application
-
Process - click to process this application
Reviewed (not pictured, second review only) - click to confirm first review of this application if Second Review of Applications is enabled -
Process and Next - click to process this application and be redirected to the next online application
Reviewed and Next (not pictured, second review only) - click to confirm review of this application if Second Review of Applications is enabled and be redirected to the next online application