Building Management Meal Reimbursement Tab
Configuration > Buildings > Building Management > Meal Reimbursement
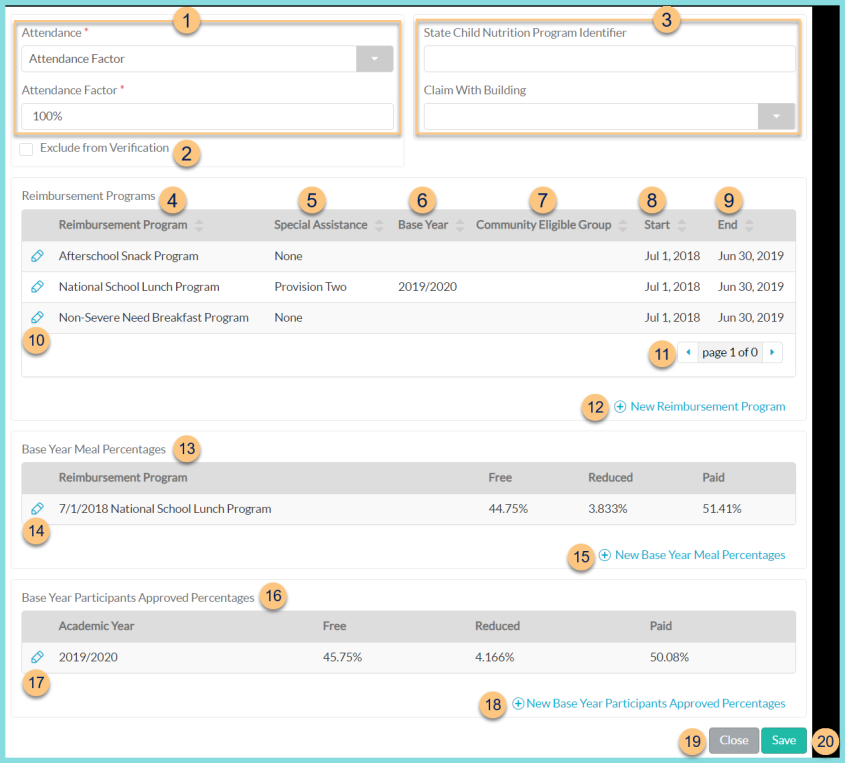
The fields on this page are used to configure reimbursement options for the building.
-
Attendance - Select the attendance method
Attendance Factor - enter the attendance factor percentage that will be used to calculate projected attendance on the Edit Check, Building and Sales Reconciliation, Average Daily Participation, and some State Extracts.
Actual Attendance - notice the Actual Attendance Factor and Actual Daily Attendance as calculated based on Attendance entries. -
Exclude from Verification - check this box if this building should not be included in verification or counted on the Verification Collection Report
Note: This is only for buildings that are not part of any claim; an example would be a building that only serves catered meals. Districts on CEP still have to report those school's numbers in verification - DO NOT check the box for these schools. -
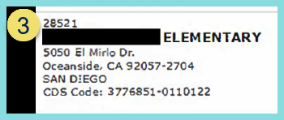
State Child Nutrition Program Identifier - enter the State Child Nutrition Program Identifier to be used on the State Claim Extract. See this image of where to find the identifier in the state website:
OR
Claim with Building - select the building with which to include this building's reimbursable meals
Note: A building will have either a State Child Nutrition Program Identifier or will be claimed with another building, not both. -
Reimbursement Program - click to sort by Reimbursement Program. All reimbursement programs operated by this building need to be listed here.
-
Special Assistance - click to sort by Special Assistance program (None, Provision 1, Provision 2, Provision 3, Community Eligible)
-
Base Year - click to sort by base year
-
Community Eligible Group - click to sort by Community Eligible Group
-
Start - click to sort by program start date
-
End - click to sort by program end date
-
Pencil - click to edit details of an existing program
-
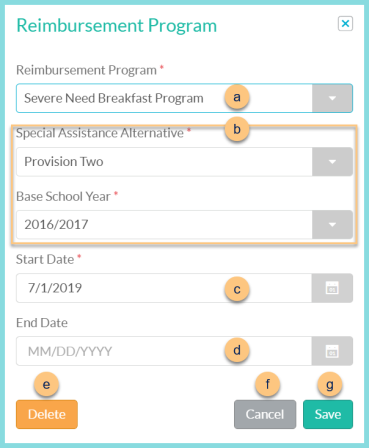
Reimbursement Program - select reimbursement program
-
Special Assistance Alternative - select special assistance alternative if applicable (None, Provision 1, Provision 2, Provision 3, Community Eligibile). Then select the Base School Year (not pictured) if Provision 1-3 was selected, or select Community Eligible Group (not pictured) if Community Eligible was selected.
-
Start Date - select the program start date. Note: Enter this as the first of the applicable month to prevent an error on the Claim for Reimbursement report.
-
End Date - leave blank if this program is actively operating at the building. An end date can be entered later if the building begins operating under a different reimbursement program for the same serving session (ex: Non-Severe Need Breakfast to Severe Need Breakfast).
-
Delete - click to delete the record of the reimbursement program
-
Cancel - click to return to the previous screen without saving changes
-
Save - click to save changes
-
< > - click to scroll through pages
-
(+) New Reimbursement Program - click to add a new reimbursement program
-
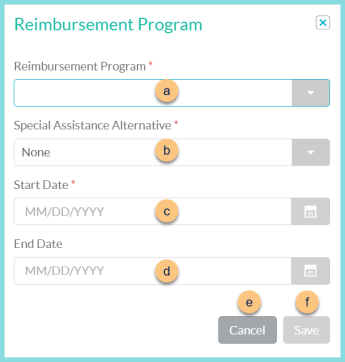
Reimbursement Program - select reimbursement program
-
Special Assistance Alternative - select special assistance alternative if applicable (None, Provision 1, Provision 2, Provision 3, Community Eligibile). Then select the Base School Year (not pictured) if Provision 1-3 was selected, or select Community Eligible Group (not pictured) if Community Eligible was selected.
-
Start Date - select the program start date. Note: Enter this as the first of the applicable month to prevent an error on the Claim for Reimbursement report.
-
End Date - leave blank if this program is actively operating at the building. An end date can be entered later if the building begins operating under a different reimbursement program for the same serving session (ex: Non-Severe Need Breakfast to Severe Need Breakfast).
-
Cancel - click to return to the previous screen without saving changes
-
Save - click to save changes
-
Base Year Meal Percentages - notice the Base Year Meal Percentages, which are used to calculate Free, Reduced, and Paid meals on the Claim for Reimbursement report. This section is only visible if Provision 1, 2, or 3 is selected as a Special Assistance Alternative above.
Free = Average of Free per Month
Reduced = Average of Reduced per Month
Paid = 100% - Free - Reduced -
Pencil - click to view/edit base year meal percentages. See step 15 for details.
-
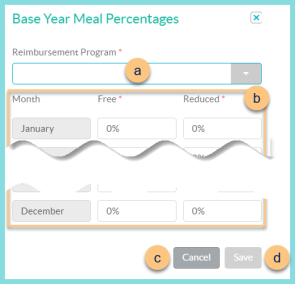
(+) New Base Year Meal Percentages - click to add a new base year record
-
Reimbursement Program - select the Reimbursement Program to which the meal percentages apply
-
Month - enter the Free and Reduced meal percentages per Month during the Base Year. Notice that the months are in chronological order of a calendar year rather than a school year.
-
Cancel - click to return to the previous screen without saving changes
-
Save - click to save changes
-
-
Base Year Participants Approved Percentages - notice the Base Year Participants Approved Percentages, which are used to calculate Free, Reduced, and Paid participants on the Claim for Reimbursement report. This section is only visible if Provision 1, 2, or 3 is selected as a Special Assistance Alternative above.
Free = Average of Free per Month
Reduced = Average of Reduced per Month
Paid = 100% - Free - Reduced -
Pencil - click to view/edit base year participants approved percentages. See Step 18 for details.
-
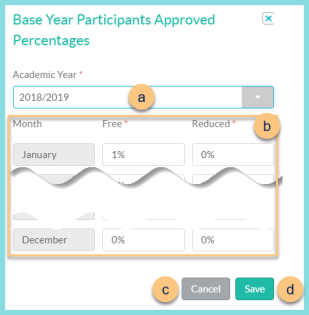
(+) New Base Year Participants Approved Percentages - click to add a new base year record
-
Academic Year - select the Academic Year to which the participants approved percentages apply
-
Month - enter the Free and Reduced participants approved percentages per Month during the Base Year. Notice that the months are in chronological order of a calendar year rather than a school year.
-
Cancel - click to return to the previous screen without saving changes
-
Save - click to save changes
-
-
Close - click to return to Building Management without saving changes
-
Save - click to save changes