Item - General Tab
Items > Item Management > (Select Item) > General
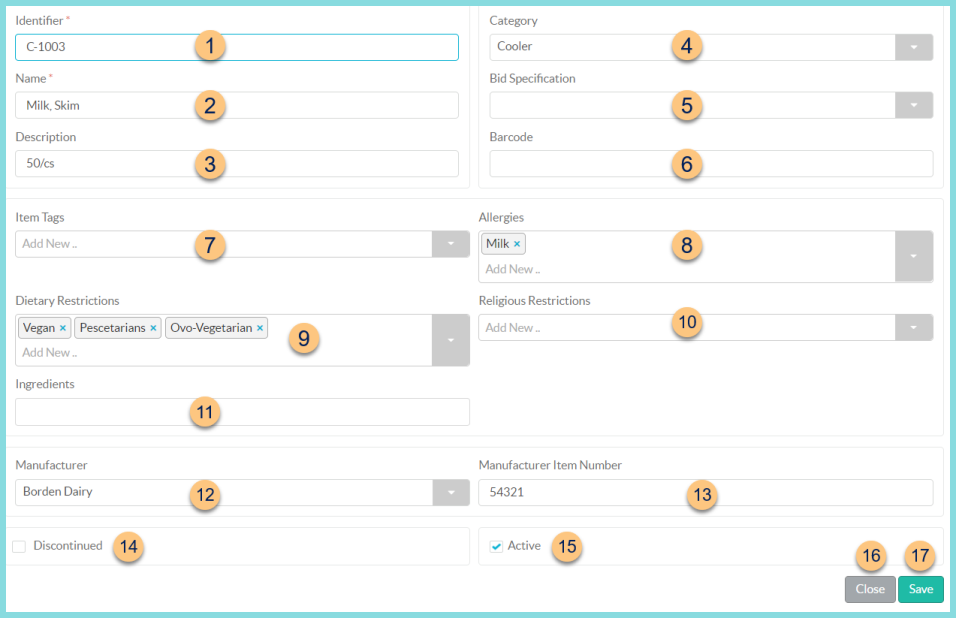
The fields on this page represent basic Item information.
-
Identifier - update identifier if needed
-
Name - update name if needed
-
Description - enter a description to appear on various reports and inventory screens
-
Category - select the item category
-
Bid Specification - select the bid specification
-
Barcode - enter the barcode if using the Item Tracking module
-
Item Tags - select item tag(s)
-
Allergies - select allergens that CANNOT be served this item
Note: Allergens roll-up into recipes, appear in the LINQ Connect Online Menu, and block Sales items from being served at the POS to students/staff with the allergy. -
Dietary Restrictions - select dietary restrictions that CANNOT be served this item
Note: If this item is a Sales item, it cannot be served at the POS to students/staff with a matching restriction. -
Religious Restrictions - select religious restrictions that CANNOT be served this item
Note: If this item is a Sales item, it cannot be served at the POS to students/staff with a matching restriction. -
Ingredients - scanned ingredients appear here upon posting the nutrition facts review. Ingredients can be entered manually if desired (hit enter key between each ingredient).
-
Manufacturer - select the Manufacturer
-
Manufacturer Item Number - add manufacturer number for documentation purposes
Districts (not pictured, enterprise only) - select districts or district groups to which this item should sync
Note: this field is visible on items with the ingredient or simple recipe attributes. -
Discontinued (inventory attribute only) - check to indicate that this item has been discontinued
Note: Discontinued items will be marked as such on Orders and Ordering Guides and can no longer be ordered.
Replacement Item - select replacement inventory item -
Close - click to return to Item Management screen without saving changes
-
Save - click to Save changes